 Not the type of static I’m talking about
In the last part, we finished setting up your azure account so that you could deploy a static website. With that completed, we should be ready to start setting up our actual project and start development.
Local Environment Setup
- If you haven’t installed it already, you’re going to need to install Nodejs: https://nodejs.org/. Either LTS or Current should work fine.
- Install the gatsby globally by running the following command in your command prompt of choice
npm install -g gatsby-cli- After gatsby is installed, open a command prompt and create a folder on your machine where you intend to keep your project. Then run the following command to create a new gatsby project (you can replace gatsby-starter-lumen with whatever you want to call your website)
gatsby new gatsby-starter-lumen https://github.com/alxshelepenok/gatsby-starter-lumenYou should see the command line interface create the project.
- When it finishes, run the following command in your gatsby project to run your website on your local machine
gatsby develop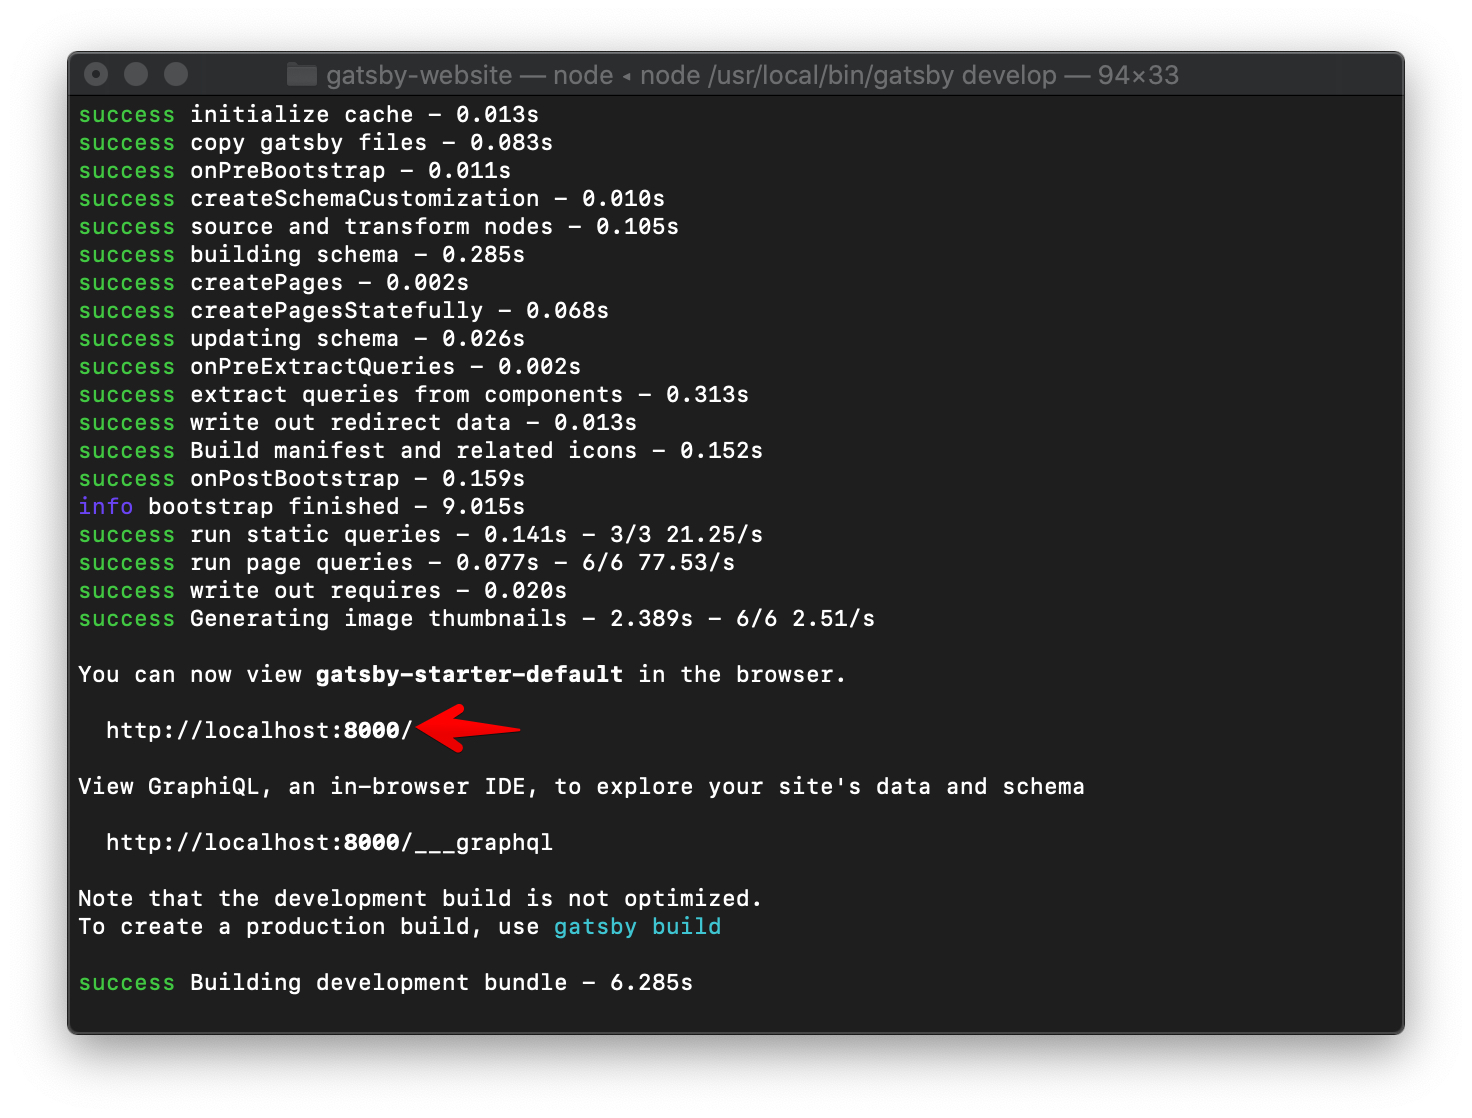
The command line will tell you where you need to navigate to to view your website locally. Mine was https://localhost:8000. Navigate to this location with your favorite browser and you should see this page.
If this displays, you’re ready to start making changes. In the next section I’ll go over pushing your new website to Azure.